frankie exclusive diy: pom pom house slippers
These handmade slippers will keep your tootsies cosy while you’re shuffling from the heater to the warmth of the oven and back
These handmade slippers will keep your tootsies cosy while you’re shuffling from the heater to the warmth of the oven and back. They can be decorated however you like – we’ve used pom poms, but you could embellish these guys with some hand stitching, sew on jewels or keep them plain for a simple look!
MATERIALS
about half a metre or 10 x sheets of 1mm craft felt
wool
wool needle
craft glue
a few sheets of scrap paper & some card
pen
scissors
ruler
pins
sticky tape
measuring tape
awl or nail and hammer (optional)
gold lurex thread (optional)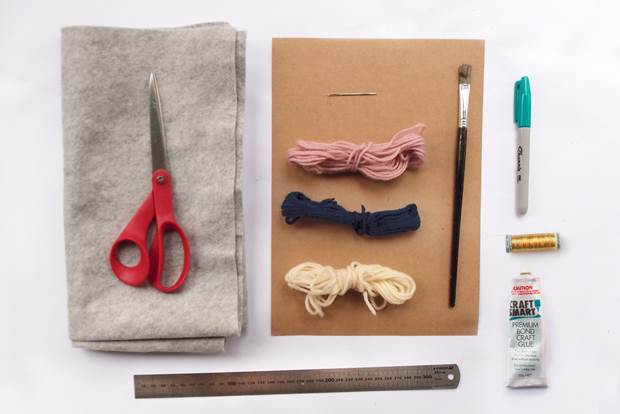
INSTRUCTIONS
1. Make a pattern piece for the sole of your slippers by tracing around one of your feet on some paper. I wore socks for this step to give a smoother shape to my foot. Using a ruler, add 1cm around your traced foot and cut out.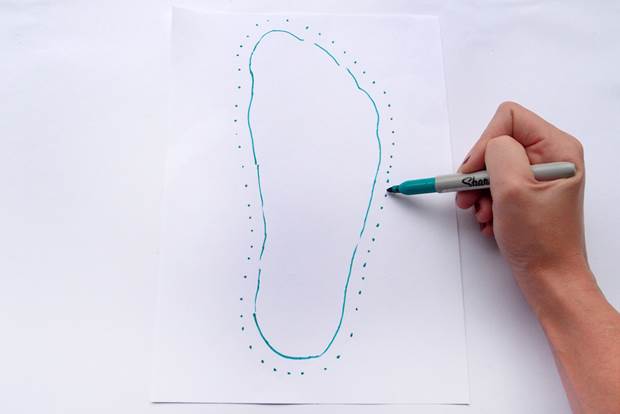
2. Pin your sole pattern piece to the felt and cut out one piece. Use the paintbrush to spread craft glue all over the reverse side of this pattern and stick down onto the main piece of felt. Cut roughly around this piece (you will trim it later on!) and repeat two more times so that your sole is four layers of felt thick. Flip the pattern over and repeat for your other foot.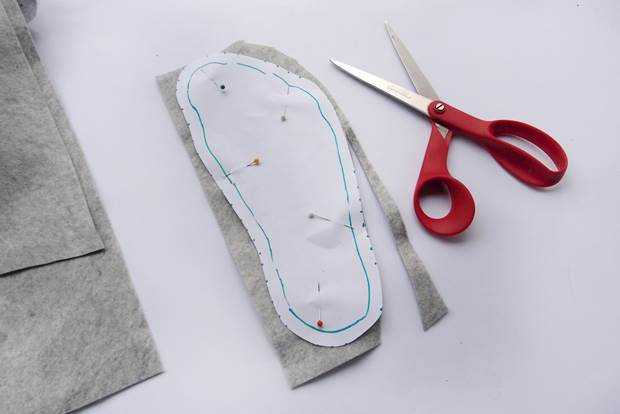
3. To make the pattern for the top of your slipper, retrace your sole pattern onto a new piece of paper. Draw a curve around 2/3 of the way down from the toes. Rule a straight line from the middle of the curve to the top of the toes. Cut along the curved line, then cut along the straight line from the bottom to the top. Cut almost all the way through, leaving the paper still attached at the top.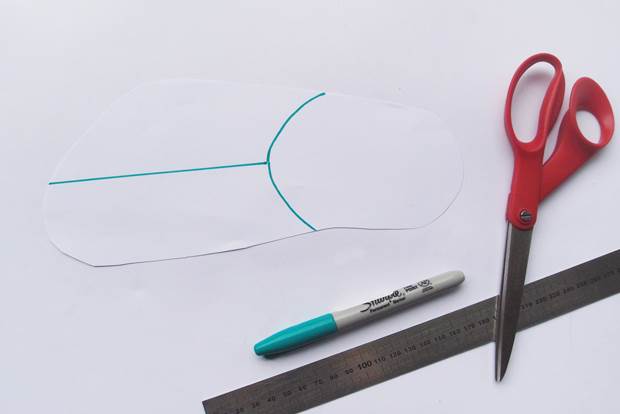

4. Now you will need to measure your foot! Place it flat on the floor and use a measuring tape over the top from arch to outer edge, where the top slipper piece will sit. This measured 18cm on my foot, and I’m around a size 9.5. Using your ruler, open up the top pattern piece until the total bottom edge measurement matches that of your foot. Stick the pattern down to a new piece of paper and cut it out – this is your new top pattern piece!
5. Pin your top pattern piece to the felt and cut out one copy. Glue this to the main piece of felt, cut out and repeat until it’s three layers thick. Flip the pattern over and repeat for your other foot.
6. After leaving your felt pieces to dry you can use the top layer as a guide to trim each piece neatly.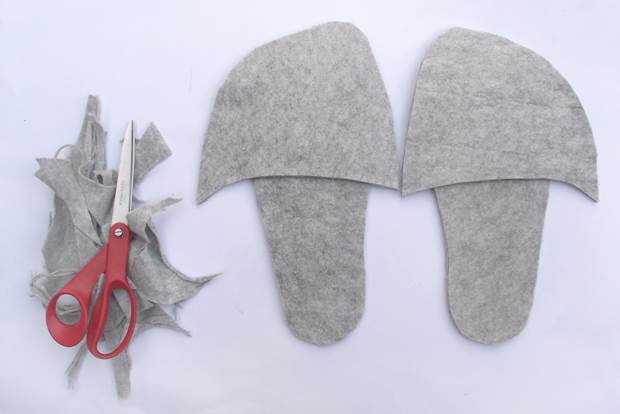
7. Now it time to start stitching! Use your needle and some wool to stitch straight across the top opening. Pin the top piece in place and use blanket stitch to sew all around the outside of the slipper, which will stitch both pieces securely together. I found using an awl to poke holes before stitching was helpful, as the felt was quite thick - you can use a needle or a hammer and nail to punch holes into the felt before stitching if you are finding it difficult.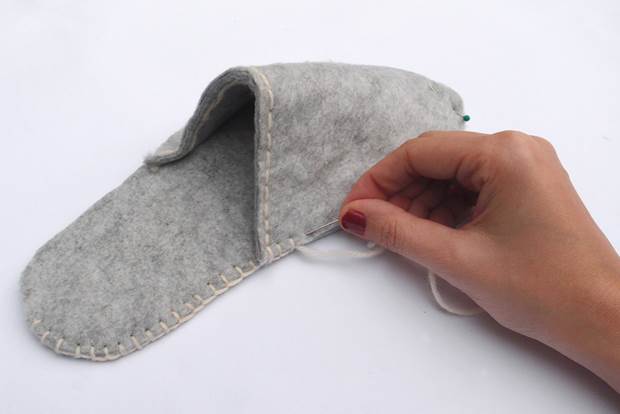
8. After the slippers are finished it’s time to decorate them! I decided to top each slipper with two pom poms. Use a jar or glass to trace eight small circles onto card and cut these out with a hole in the middle. Make each pom pom by threading wool around two of these doughnut shapes. Use some gold lurex thread to add some subtle shine!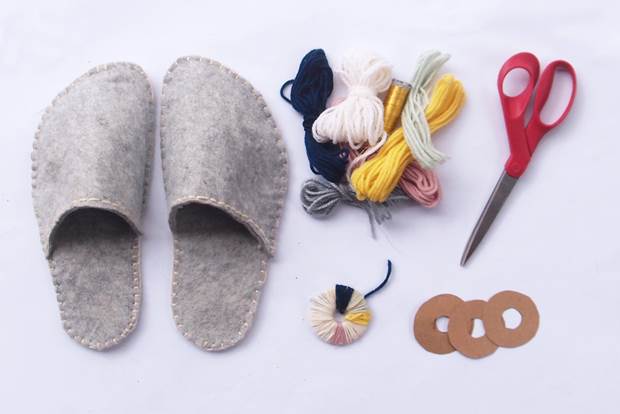
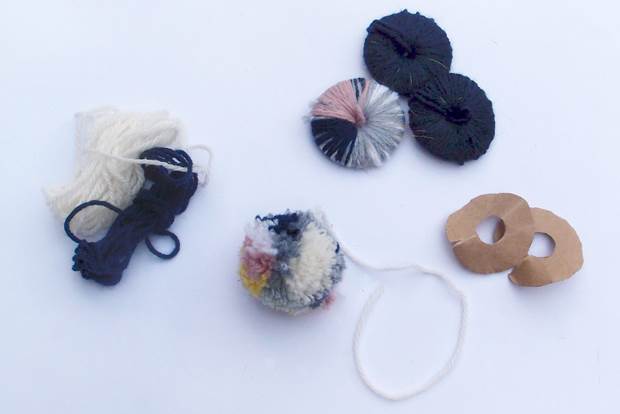
9. Cut the pom poms off the card and tie with a scrap piece of wool leaving a tail of around 20cm so you will be able to attach them to the slippers. Trim the pom poms to make them neat and use your needle to stitch them onto your slippers. And voilà: you’ll have cold feet no more!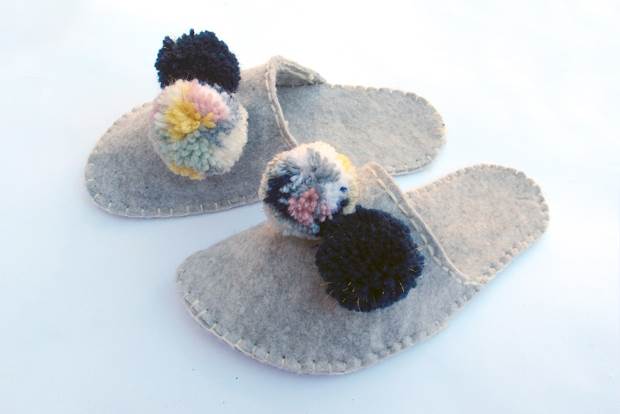
Photos and words by Esther Sandler, the clever lady behind Togetherness Design.


.jpg&q=80&w=316&c=1&s=1)


.jpg&q=80&w=316&c=1&s=1)