frankie exclusive diy: fabric-covered flower pots
Garden pots don't need to be plain or boring when you can make brightly coloured homes for your plants with just some fabric scraps and craft glue.
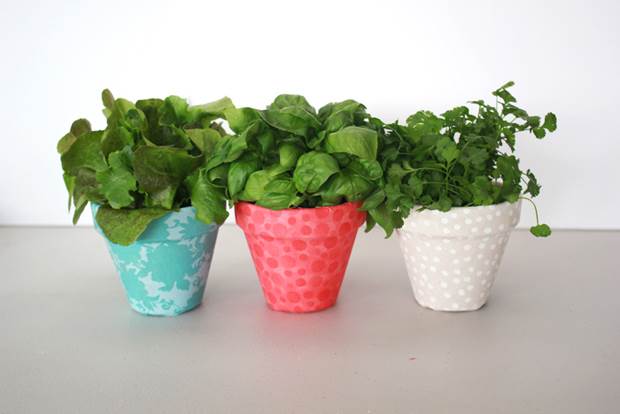
Garden pots don't need to be plain or boring, nor do you have to shell out the big bucks for a set of so called 'designer' decorated pots. Not when you can make brightly coloured homes for your plants with just some fabric scraps and craft glue. Choose fabrics that suit your own style; make a matching set or mix and match different colours and patterns. The beauty of personalising your garden pots in this way is that they can be as unique as you are!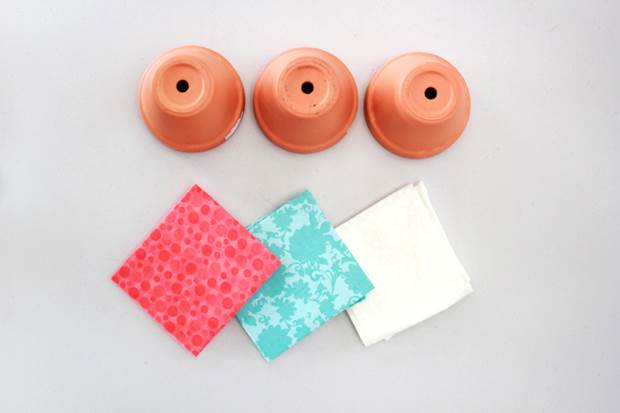
You will need: Garden/flower pots, fabric in a few colours and patterns, a bottle of PVA craft glue and a large clean paintbrush.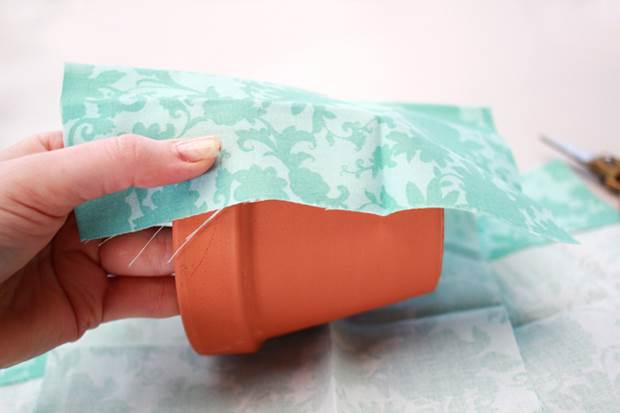
INSTRUCTIONS:
1. Start by cutting a length of fabric that will wrap once around your pot. The fabric will curve around the pot as you attach it, so leave extra room at the top and bottom to allow for this.
2. Wipe down your pot with a moist cloth to ensure you have a clear surface. Allow to dry before beginning.
3. Apply an even layer of PVA glue to a small section of your pot, ensuring that the glue covers from the top edge to the bottom.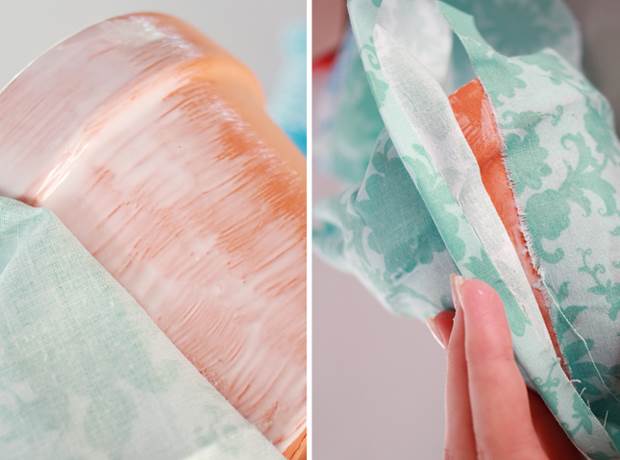
4. Attach the end of your fabric length to the pot at an angle and smooth down, starting from the top. Ensure that the fabric sits flush against the surface, paying close attention to where the pot bends out at the top.
5. Continue to apply the glue and smooth down the fabric in small sections until you have covered the outside completely. PVA glue wont dry instantly, so don't be afraid to pull off a section and start again where you need too.
6. When you reach the end of the material, trim away any excess, leaving a 2cm overlap. Fold this over onto itself to create a 'hem' and glue down securely. Trim away the excess material from the top and bottom so that there is only an overlap of around 4cm at the top and 2cm at the bottom.
7. Cut slits in the excess fabric at the top and bottom, around 3cm apart. Apply glue to the inside rim of the pot.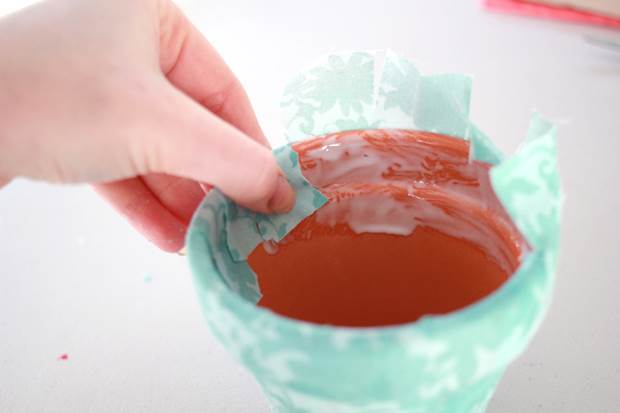
8. Fold down the fabric strips you just cut, one at a time, into the pot to create pleats. The slits will allow the fabric to fold over so that it lays nice and flat around the rim. (Be careful not to cover up the drainage hole!)
9. Repeat the same process on the bottom of the pot ensuring the fabric is flush against the bottom so your pot will stand up straight when you're done.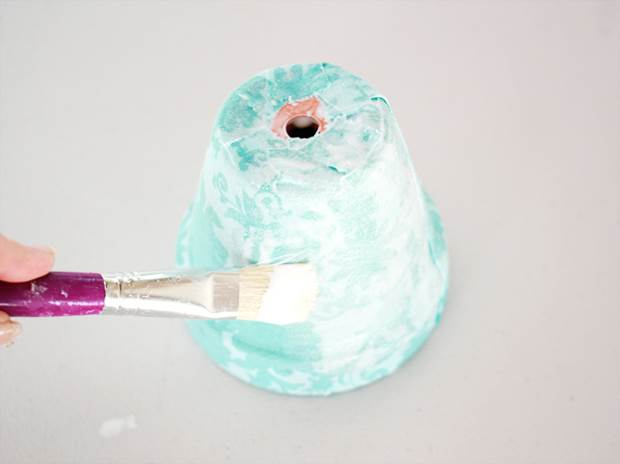
10. Coat the whole pot with another generous layer of glue and leave to dry.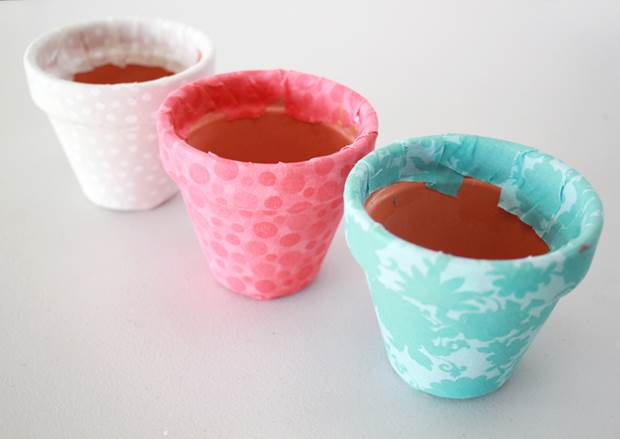
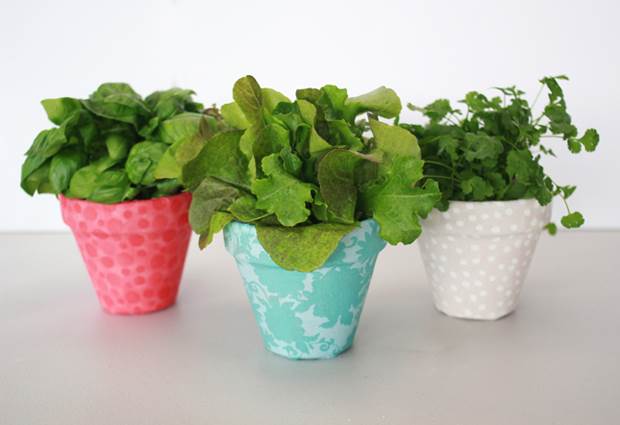
As the glue isn't waterproof, you're best off keeping these babies indoors. They may not hold up to the elements, but a set of these pretty little pots will brighten up any windowsill.


.jpg&q=80&w=316&c=1&s=1)


.jpg&q=80&w=316&c=1&s=1)