frankie exclusive diy: colourful hanging decoration
This rainbow beauty is perfect for making drab doorways and windows look a little bit fancy, or for providing a snazzy splash of colour to a plain wall.
In Poland, traditional craftspeople make colourful mobiles from paper and pom poms called Pajaki (or Polish Chandeliers) to adorn their homes. We love the look of these beautiful creations and decided to put our own little spin on the idea by making this bright, summery hanging decoration. This rainbow beauty is perfect for making drab doorways and windows look a little bit fancy, or for providing a snazzy splash of colour to a plain wall that before now, was a little bit boring. If you're on a Christmas comedown but still feeling a little crafty, why not give it a whirl? We thought it might also be neat to re-use some of your wrapping paper from Christmas to create the bows, flowers and circles - just think of how cute the frankie giftwrap would look!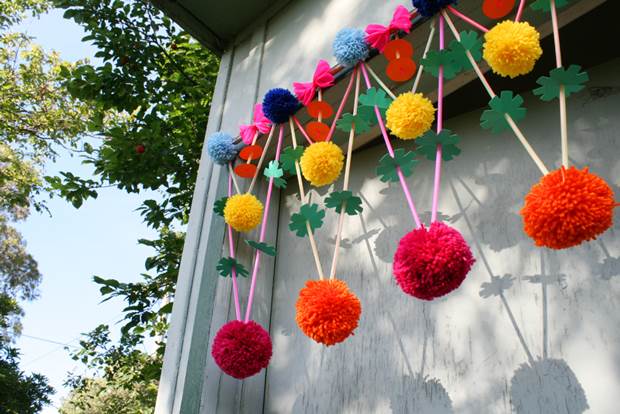
MATERIALS
1 dowel rod, approximately the width of a door frame.
coloured straws (cut the bendy bit out so you have a collection of short and long pieces. we used a mixed pack of straws from the supermarket.)
20 green cardboard circles (use a small jar as a template for the circle)
10 orange cardboard circles (slightly smaller than the green ones)
coloured tissue paper
coloured wool
coloured twine
scissors
darning needle
pom pom maker
INSTRUCTIONS
Prepare your bits and pieces:
PAPER FLOWERS
Use the green cardboard circles. Fold each circle in half, then in half again to form a wedge. Snip the two corners at a slight angle, then cut a tiny triangular segment out of the space in between these corners. Don't cut anything at the point where all the folds meet. Unfold the circle to form the flower. You'll need 20 of these. You'll also need 10 smaller normal circles cut from orange card.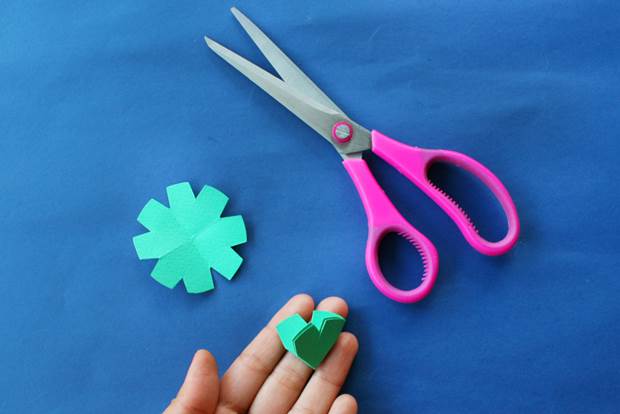
PAPER BOWS
Cut a rectangular segment from a sheet of coloured tissue paper (we used the existing fold lines of the sheet as a guide). Concertina fold up the length of the segment, then hold the folded bundle together and cut a curved edge on either side. Pinch the middle of the bundle and tie a tight knot with a piece of wool. Gently open up the folds slightly to form a bow. You will need to make 5 bows.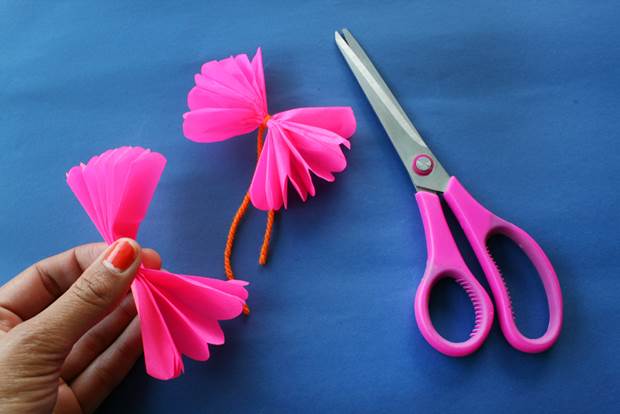
POM POMS
There are a few different ways to make a pom pom. We used a Clover pom pom maker (see here for how to use it) but you could also use the old school method with two cardboard rings, or any other way you've devised. You'll need to make five large pom poms (orange and raspberry), four medium yellow pom poms, and six pom poms in different blue colours. To make a pom pom smaller, just give it an extra trim with scissors. Make sure to leave the string you tied the pom pom together with attached, as you'll need it later.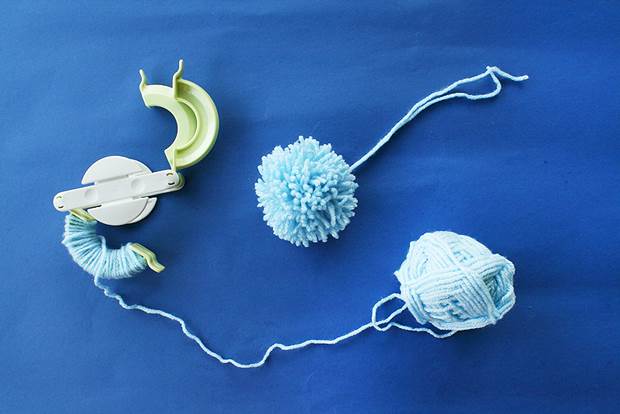
Construct the components:
1. Measure and mark out six points on the dowel rod, evenly spaced, with the two end points being approximately 4cm from either end. Cut a piece of coloured twine the same length as the dowel rod. Thread six long pink straw segments and four flowers onto the twine in the following order: straw-flower-straw-flower-straw-straw-flower-straw-flower-straw. Tie a raspberry pom pom to the twine, in between the two consecutive straws. Now repeat these steps four more times so you have five of these components in total. We changed our colour scheme for two of the components, using different coloured straws and an orange pom pom. Put these components aside for later.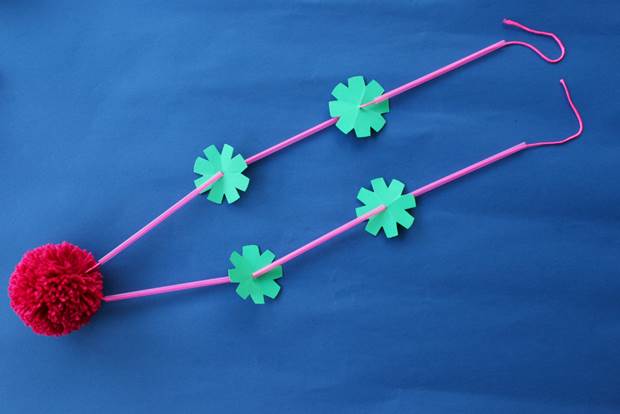
2. Cut a piece of twine half the length of the dowel rod. Thread two long and two short straw segments onto the twine in the following order: short straw-long straw-long straw-short straw. Tie a medium-sized yellow pom pom to the twine, in between the two consecutive straws. Repeat these steps four more times so you have five of these components in total. Again, we changed up the colours for two of them. Put all of these aside for later.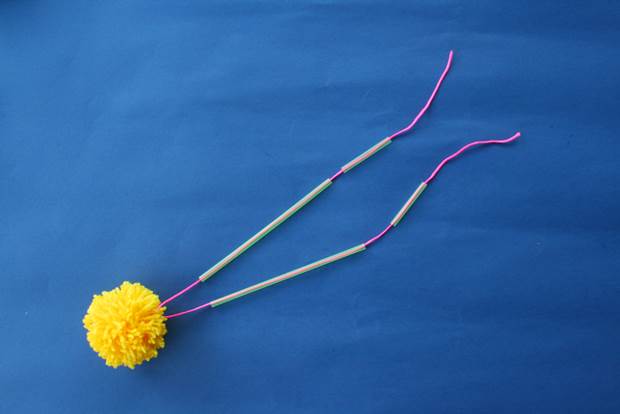
3. Cut a piece of twine slightly shorter than the one used in step two. Tie a knot at the end and thread the needle onto the twine. Thread two orange circles and two short straw segments onto the twine in the following order: circle-straw-circle-straw. Repeat these steps four more times so you have five of these components in total. Put these aside also.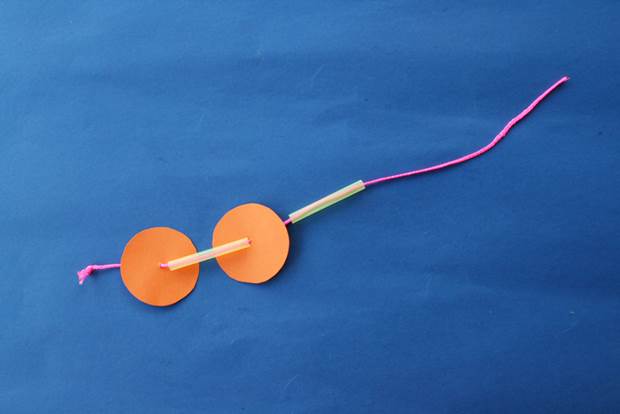
Assemble the decoration:
1. Take one of the first flower/straw components you made and tie it to the dowel rod using tight double knots. Line up each end of the twine with the marks you made on the dowel rod, starting at the end. Repeat this step with each of the flower/straw components, using the marks on the dowel rod as a guide. As you move on to the next component, you can thread the ends of the twine under the knot you made previously. This will keep all of these components linked together and secure.
2. Using the same method as the step above, tie each of the yellow pom pom components to the dowel rod. Thread each end of the twine through the knots made previously with the flower/straw components.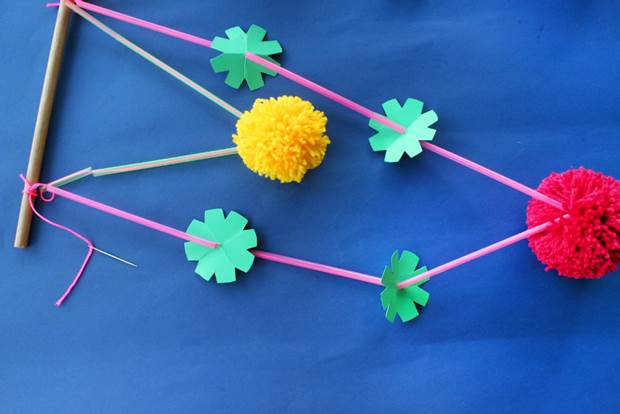
3. In the space between the knots made from the other components, tie the little orange circle strands onto the dowel rod. Again, use tight double knots. When you're sure that each component is securely fastened to the dowel rod, snip the excess twine.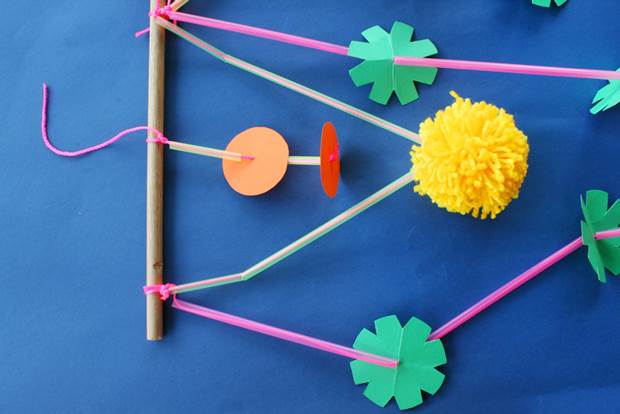
4. Tie blue pom poms onto the dowel rod, at the points where the two larger components are knotted. Alternate with light blue and dark blue pom poms. Tie the pink bows to the dowel rod at the points where the orange circle strands are knotted.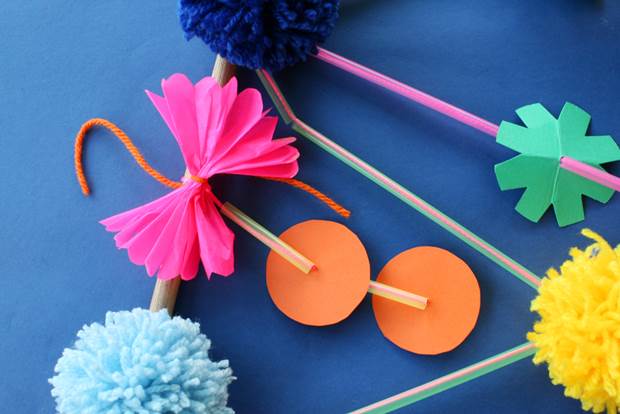
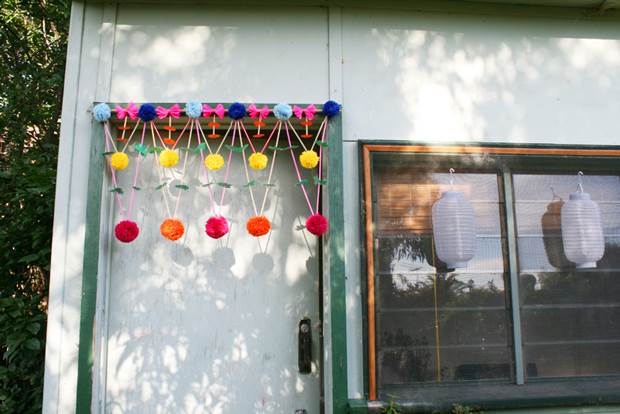
Hanging your decoration:
To hang your decoration in a door or window frame, hammer two nails into the top of the frame at either end and rest the dowel rod on top of them. To hang from a wall like a mobile, tie a long piece of coloured twine to either end of the dowel rod to use as a hanger.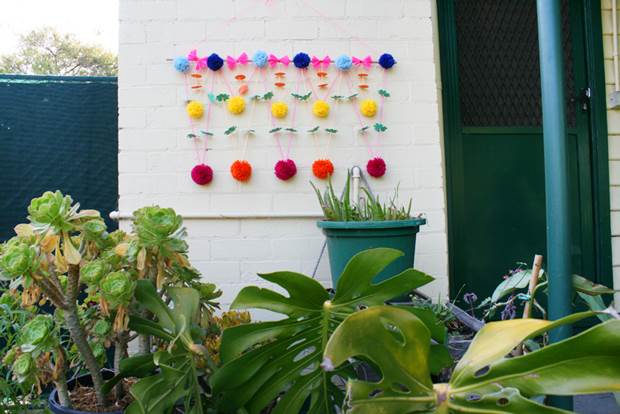


.jpg&q=80&w=316&c=1&s=1)


.jpg&q=80&w=316&c=1&s=1)