diy floral embroidery
An easy way to adorn your clothes with cute little embroidered flowers.
 If you can’t tell by all the pollen in your eyeballs, spring has sprung and so has a new collection by Uniqlo and JW Anderson – this time featuring cute embroidered flowers. Jonathan Anderson, who designed the collection, is a big fan of craft and everything handmade – he chose floral embroidery because he spent a lot of time in his garden at the beginning of the pandemic.
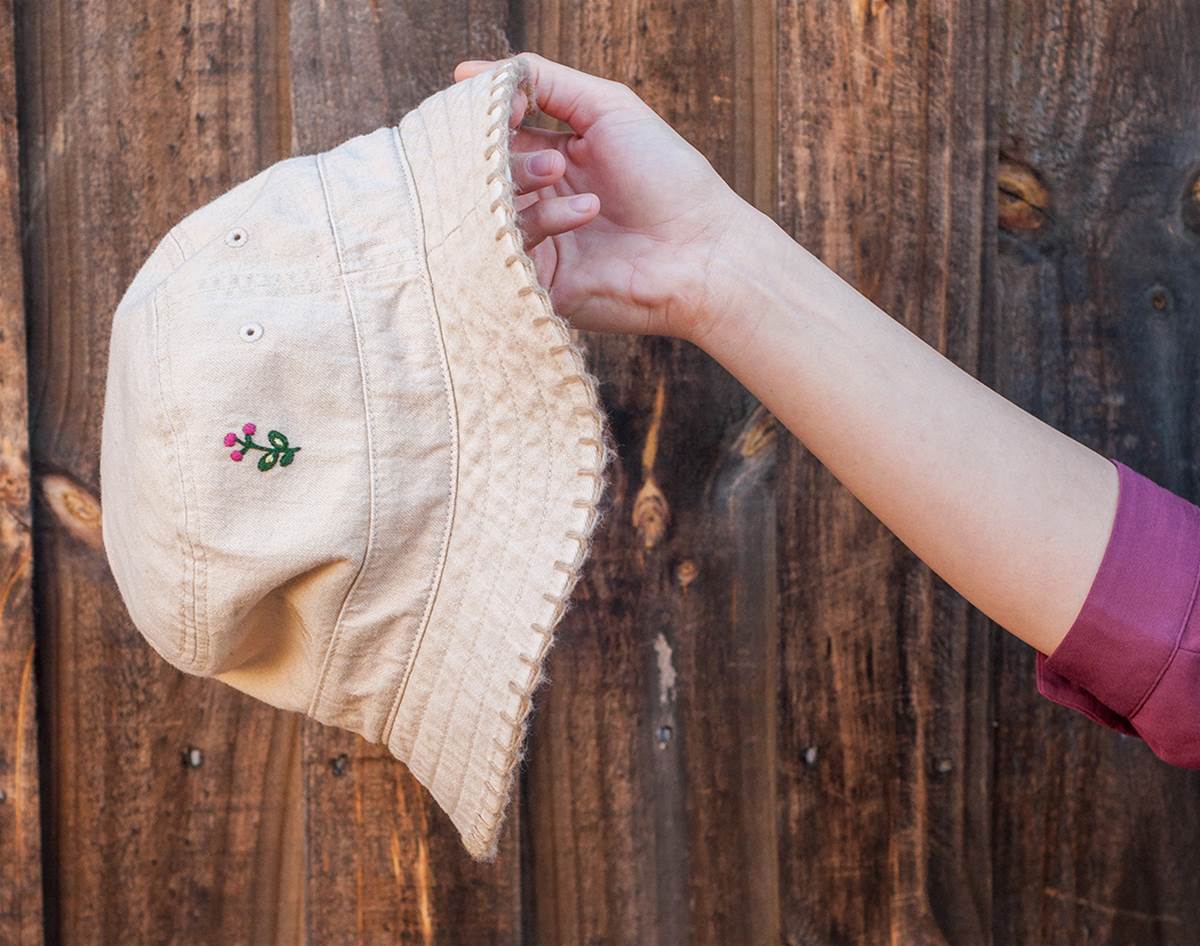 We’ve put together some instructions so you can add these easy-peasy little flowers to your favourite hats, bags or jackets all by yourself. All the materials are pretty easy to come by, but the good news is we’re also giving away 10 sweet little DIY embroidery kits so some lucky frankie readers can get most of the materials delivered straight to your front door. The kit comes with instructions for five different flower designs, but we’ve chosen the simplest to show you here.
INCLUDED MATERIALS
- 3.5” embroidery hoop
- 6 x embroidery colours
- embroidery needle
- instructions and patterns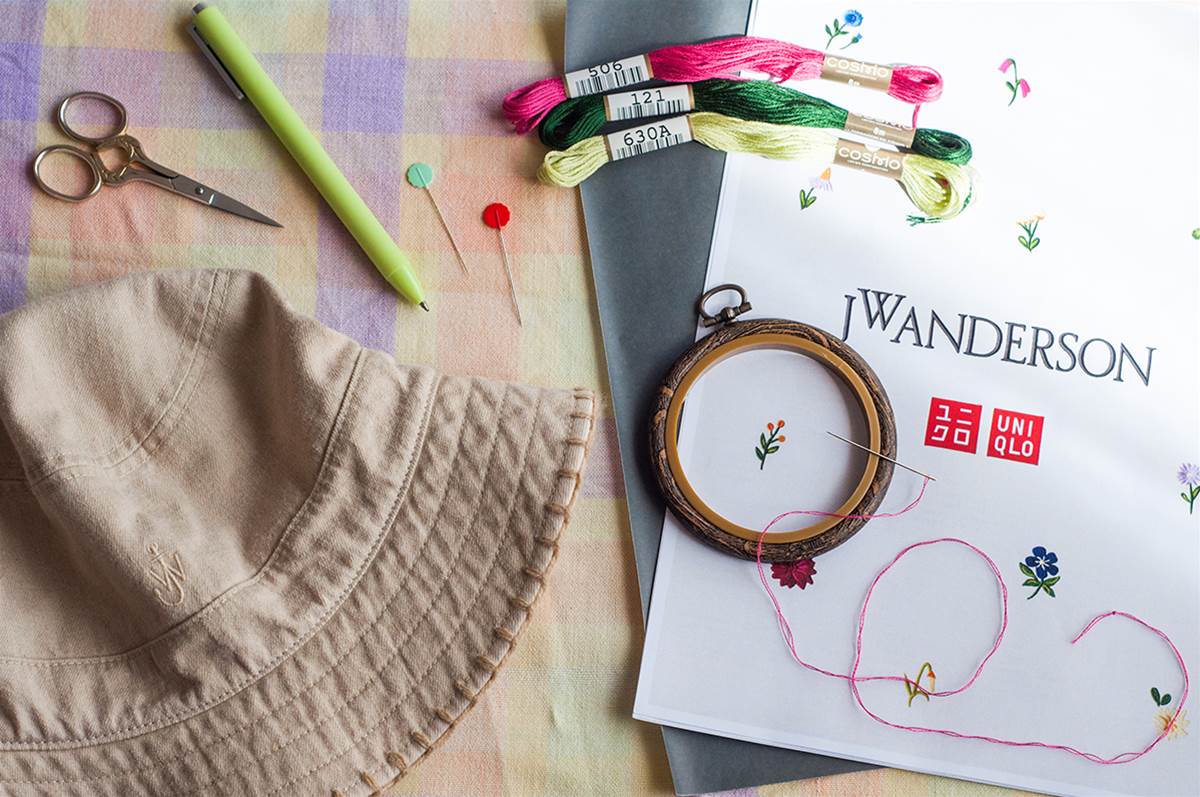 ADDITIONAL REQUIRED MATERIALS
- item to embroider (if you are new to embroidery, I would recommend choosing an item that’s made of a single layer of cotton or linen fabric)
- transfer paper in a dark colour if your item is a light fabric or in white if your item is a darker fabric
- scissors
- pins
- sharp pencil or ballpoint pen
HOW TO
1. TRANSFER THE DESIGN
For this project, I decided to go with transfer paper but you can also use iron-on piecing paper or even a light-box (or window or computer screen) if the fabric you’re using is transparent enough for you to trace it directly from the pattern. The great thing about transfer paper is if you make a mistake, you can simply remove the lines with an eraser or run it under water.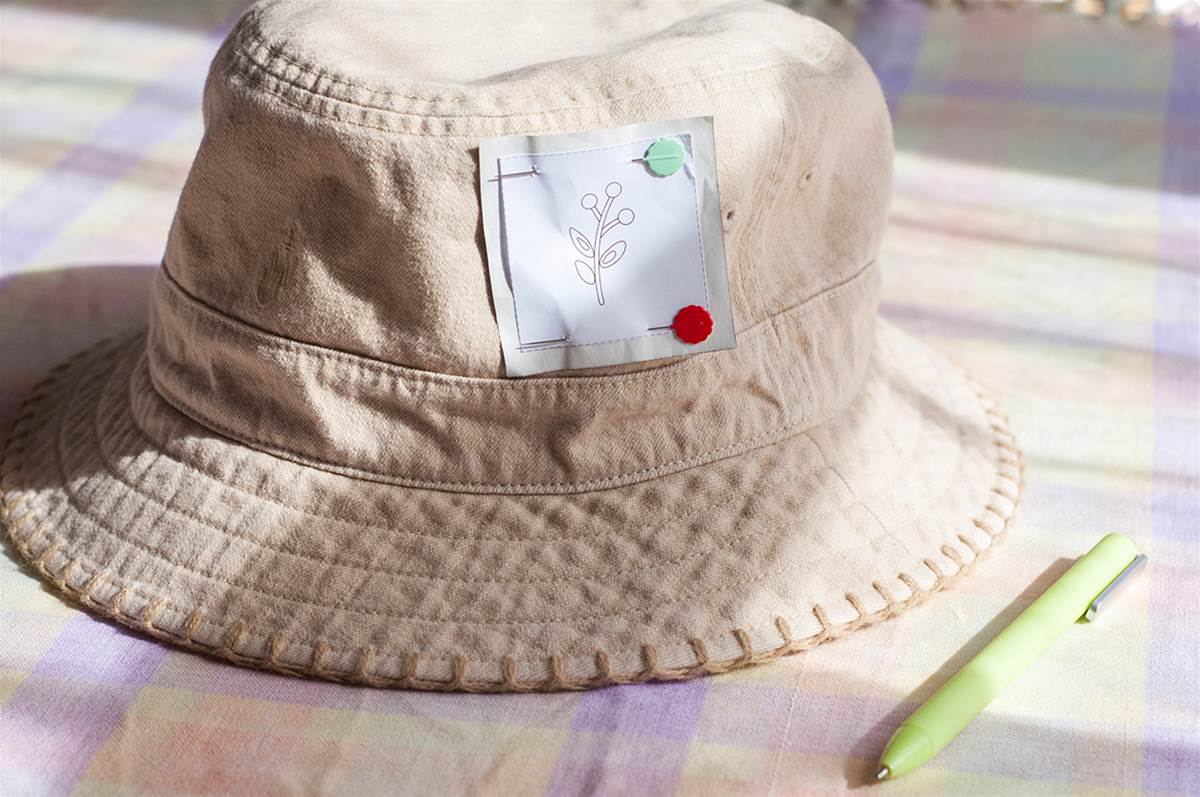 2. FIT THE EMBROIDERY HOOP
Make sure you do this on a flat surface because it will make life a whole lot easier when the fabric inside the hoop is firm. You can tug on the edges of the fabric within the hoop to make sure it’s nice and taught.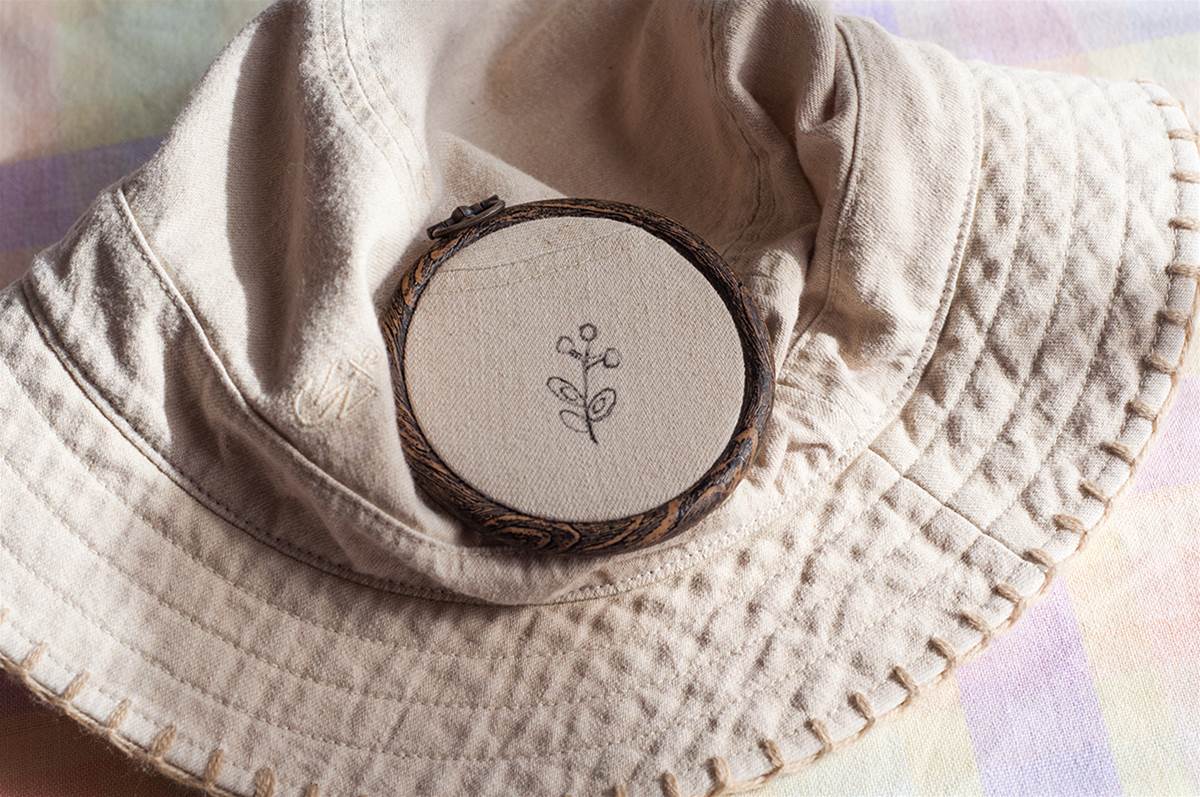 3. THREAD THE NEEDLE
Because this pattern requires two strands of thread to be used at a time, I suggest using just one strand cut at a longer length and threading it all the way through so both ends are touching. Having one strand doubled is easier to tie a knot with.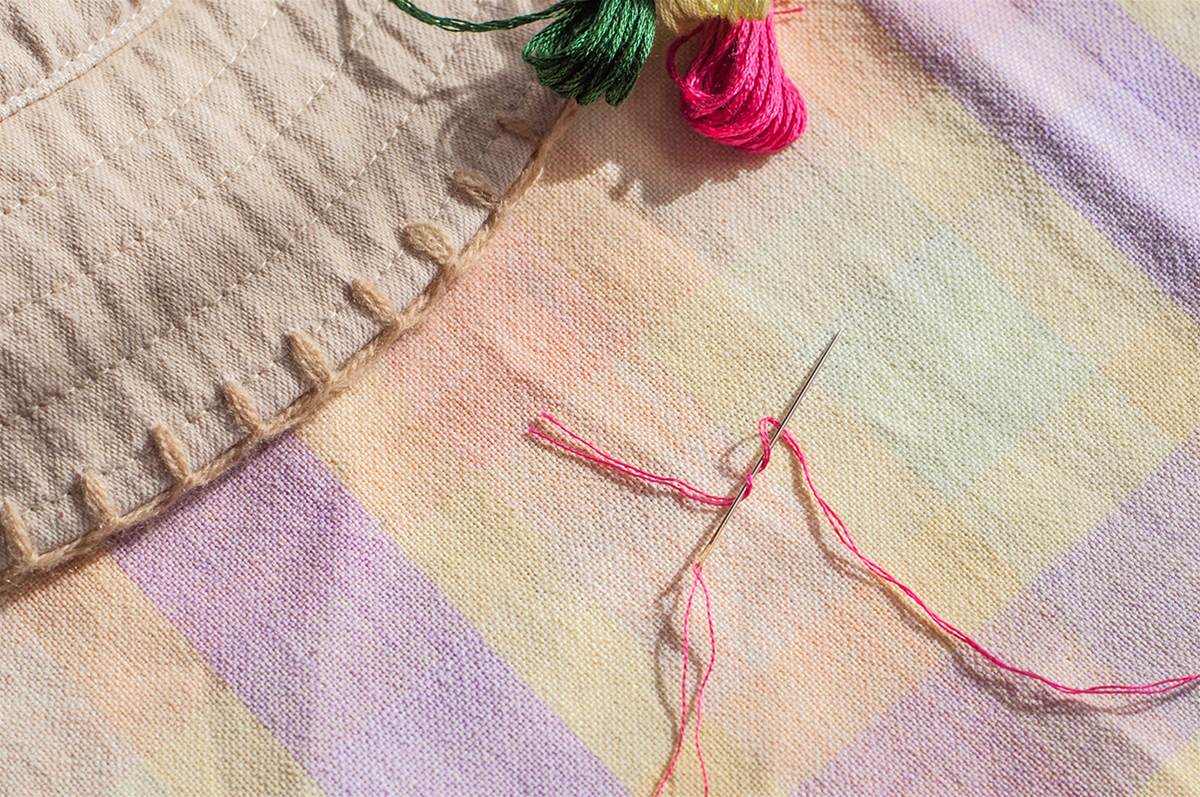 My favourite way to tie a knot once the needle is threaded is to hold both ends of the thread horizontally (facing toward the inside of your hand) between your index finger and your thumb and place the needle on top vertically so the pointy end sticks out. Keeping the needle and thread held together, use your other hand to grab the hanging thread and wrap it around the needle sticking out two times. With the wrapped threads and the needle still being held tight, slowly pull the needle all the way out while the threads are kept pinched between your fingers. Once the thread is pulled all the way through, release your fingers and give a little tug on the knot you’ve just created!
3. STITCHES TO USE
You'll need to use two different types of stitches. The first is satin stitch.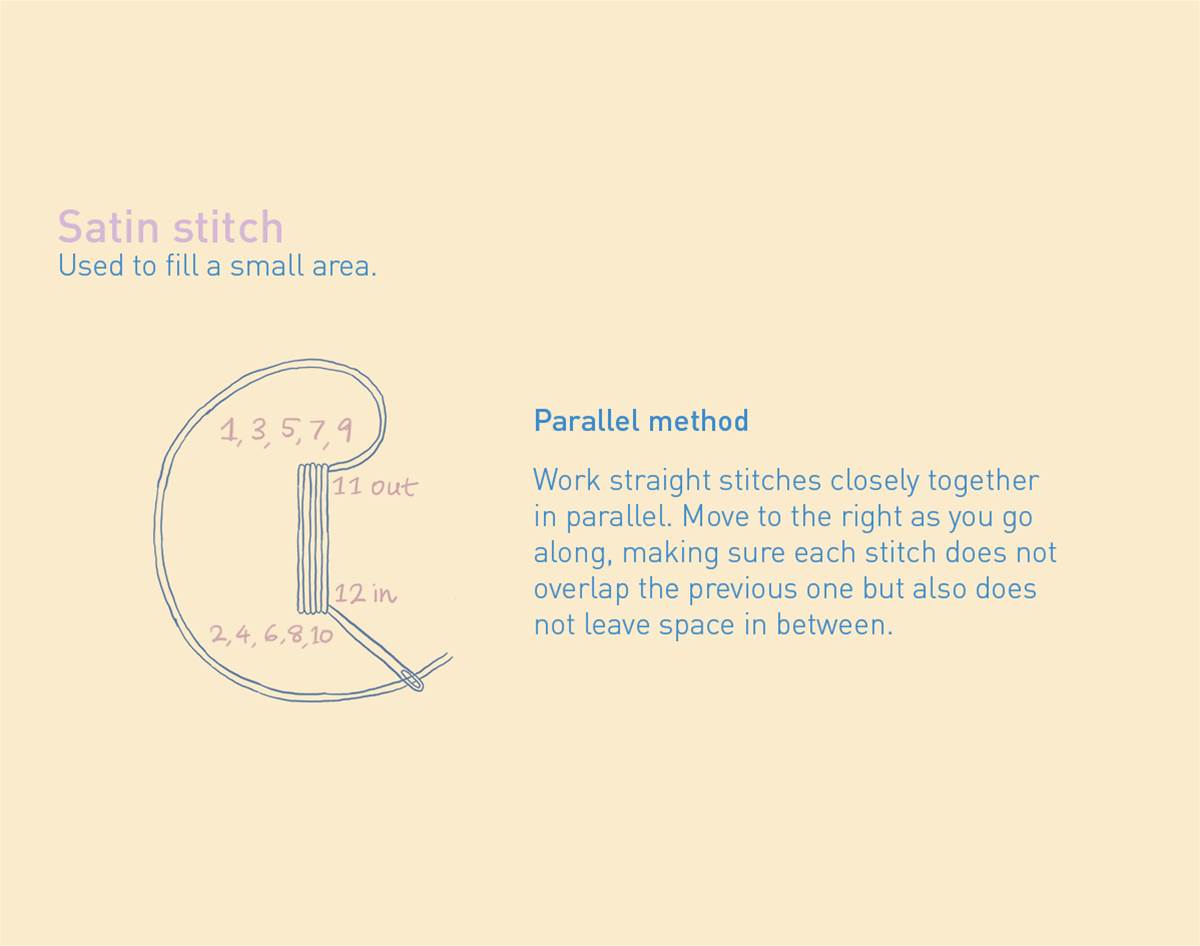 The second is back stitch.
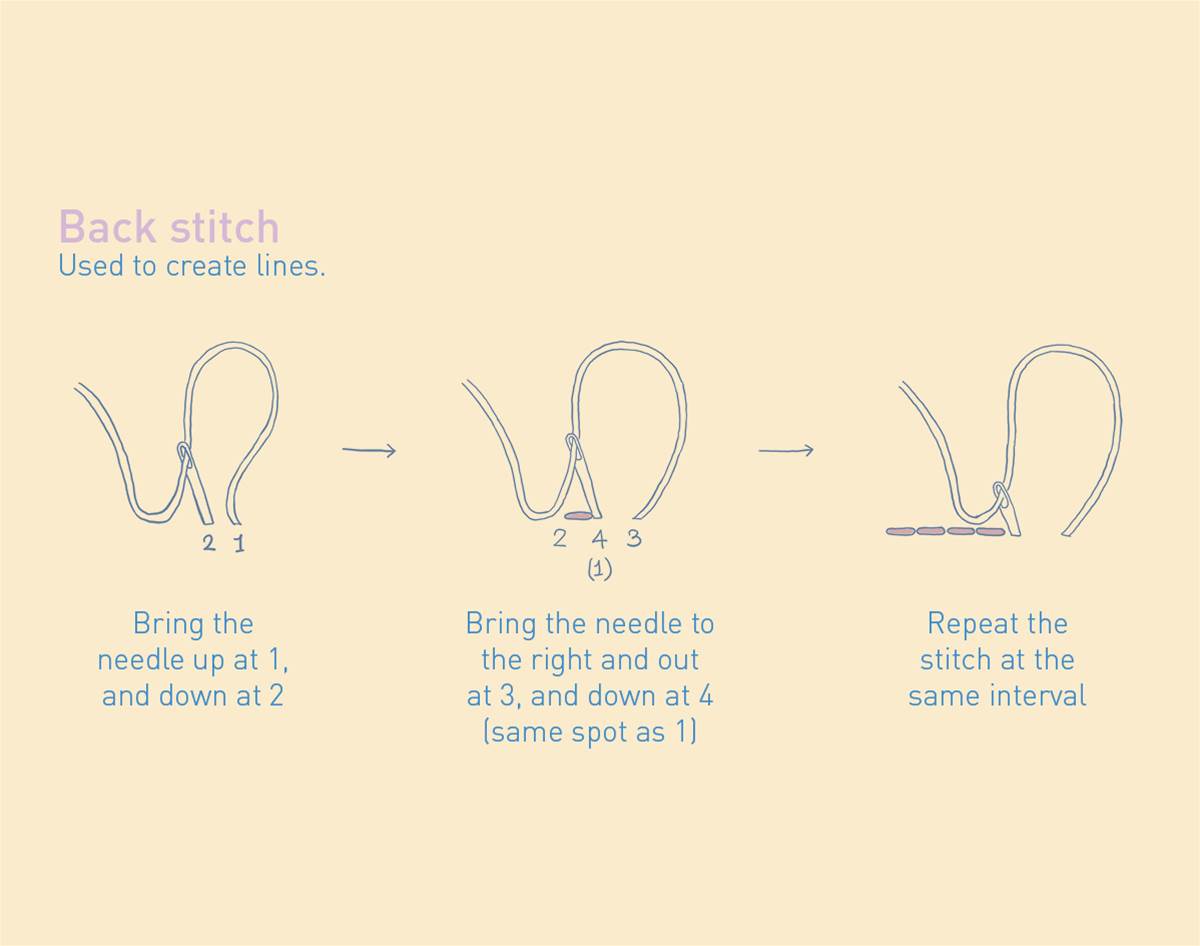 5. EMBROIDERY PATTERN
Follow the stitch order as you go along and refer to the red lines in the illustration for the direction of satin stitches. Use two strands of thread for all steps.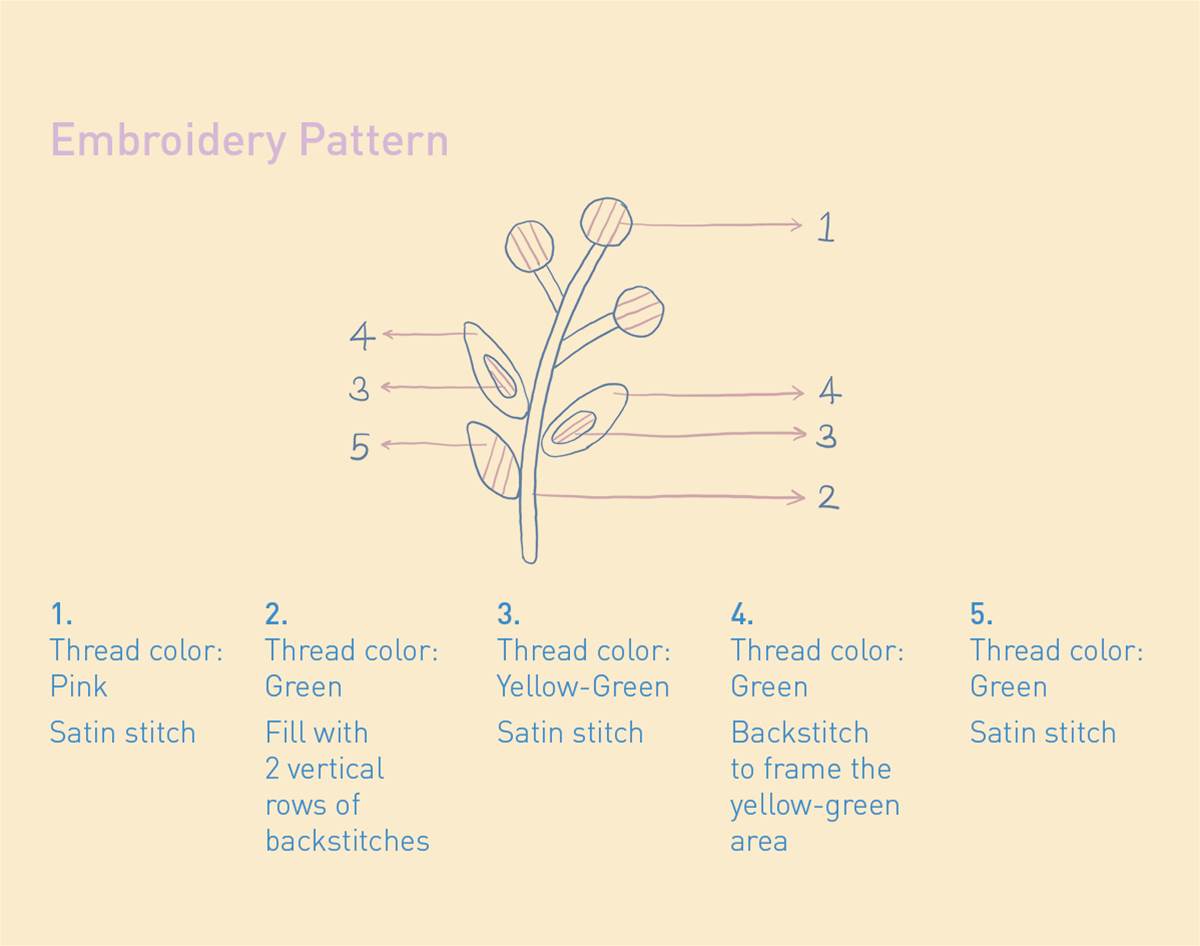 EMBROIDERY TIPS
When you’ve finished with each colour, push the needle through to the back of the piece and flip the hoop over. From where the thread is situated, thread the needle through the most recent stitches you’ve done making sure you only go behind the thread and not the fabric. Bring the needle up and do it again but in a different direction, hiding the thread in your stitches. Cut the thread but leave it long enough so you can use both strands to tie a standard knot a couple of times over. Trim the leftover thread so there’s a few centimetres left.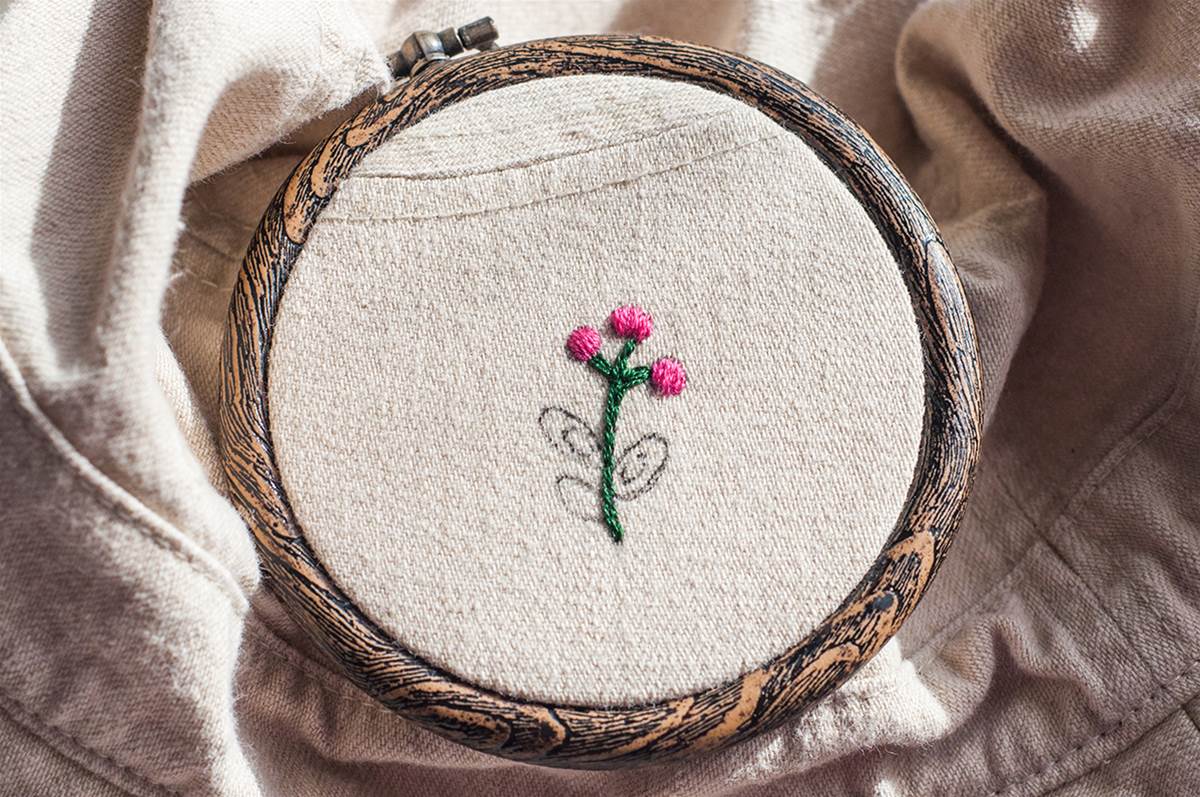 There are five different flower designs to choose from in the kit, each with its own difficulty
rating. If you are brand new to embroidery, you might want to practice on a scrap piece of non-stretchy fabric until you feel ready. The great thing about embroidery is that if you make a mistake, you can undo it and no one will ever know! Feel free to embroider as many flowers as you like or keep it simple with just one. Whatever you decide, you can feel proud of yourself for adding your own personal touch to your clothing.
View this post on Instagram
This sweet DIY was brought to you in partnership with Uniqlo. Take a peek at the full Uniqlo x JW Anderson range on the Uniqlo website.


.jpg&q=80&w=316&c=1&s=1)


.jpg&q=80&w=316&c=1&s=1)