frankie exclusive recipe: party hat cakes
Hip hip hooray – it's a super-celebratory cake!
This recipe comes to us from the Alisha Henderson, one of our favourite sugar fiends, and the head honcho of Sweet Bakes. Alisha's delish party hat cakes are definitely a special occassion type of treat, perfect for a birthday or any celebration where you want some wow factor (and maybe for all your guests to whip out their phone).
PARTY HAT CAKES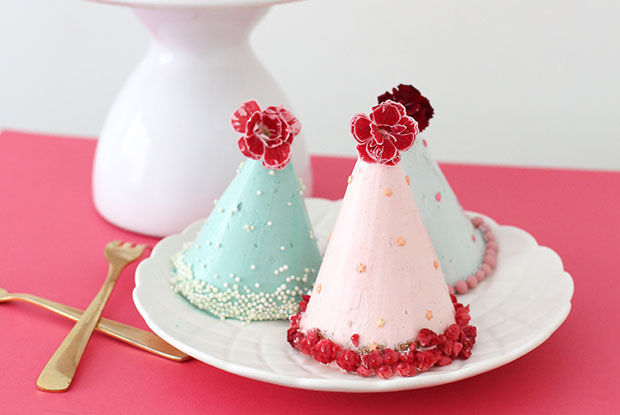
YIELD
approximately 12 hats
TIME
1.5 hours
MATERIALS
paper snow cones
stand mixer
spatula
metal bench scraper
cake board
12-cup muffin pan
CUPCAKE INGREDIENTS
125g softened butter
200g castor sugar
1 tsp vanilla bean paste
2 eggs
215g plain flour
8g baking powder
125ml room temperature milk
BUTTERCREAM INGREDIENTS
6 egg whites
2 cups caster sugar
500g softened butter, cut into cubes
gel food colouring of your choice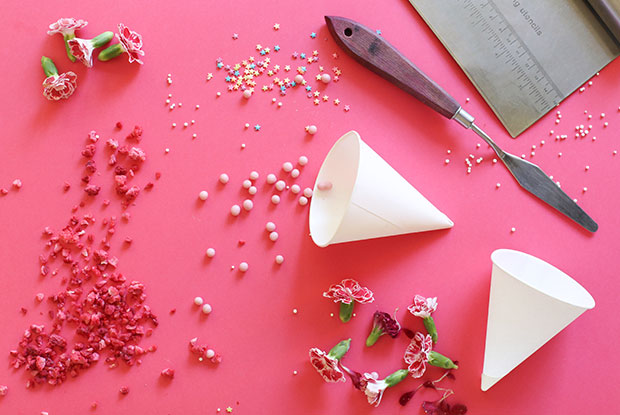
MAKING THE CUPCAKES
1. Preheat the oven to 160 degrees, fan force.
2. The hats are baked in paper snow cones. To stand these upright in an oven, you will need to prepare a 12 x muffin pan with a sheet of aluminium foil over the top. Take a skewer and poke a hole into the centre of each muffin hole, then pop a snow cone in upright. Be careful not to make the foil hole too big.
3. Cream the butter and sugar in a stand mixer with a paddle attachment for 3 minutes.
4. Add the eggs and vanilla and beat for a further 1 minute.
5. Sift the flour and baking powder in a separate bowl. Add in half the flour to the butter mixture and beat for 20 seconds. Add in half the milk and beat for 20 seconds. Repeat for the remaining flour and milk.
6. Scrape down the bowl and beat for a final 10 seconds.
7. Pop the cupcake batter into a piping bag, and fill each snow cone to just over half full.
8. Bake for approximately 15-20 minutes, or until a toothpick comes out clean. Allow the cupcakes to cool in their paper cases.
9. Using small scissors, snip the paper cone away from the cupcake. Be gentle – snip and peel the paper carefully to keep the cupcake intact.
10. Take a serrated knife and cut any dome that has formed on the base of the hats. You want the cupcake hats to have a nice flat surface to sit on. At this point, you can also hollow out the centres of your party hats and fill with jam or lollies before you begin the buttercream step. Or, just leave them plain – they'll taste great either way.
PREPARING THE BUTTERCREAM
My buttercream of choice is Swiss Meringue buttercream, which is super-smooth and silky! You can, however, use a buttercream method of your choice.
1. Wipe down your stand mixer and whisk attachment with lemon juice to remove any oils.
2. Place egg whites and sugar into the mixer bowl, then place the bowl over a saucepan containing about 5 cm of water on medium heat. Heat the egg whites gently, continuously stirring them until the sugar has dissolved. Rub the mixture between your fingers to feel for any sugar granules.
3. Move the bowl back to your stand mixer, and start to whisk on high until a stiff and glossy meringue forms. The bowl will also need to be completely cool! If it is still warm, this will melt the butter, so keep whipping until the bowl is at room temperature (this can take over 15 minutes at times).
4. Slowly, add cubes of butter, mixing for a few seconds after each addition.
5. Crank the mixer up to high once all the butter is incorporated. It may look curdled at this point, but don't worry, just keep whipping and watch it magically turn into fluffy buttercream! Add vanilla and whip for a further 5 minutes.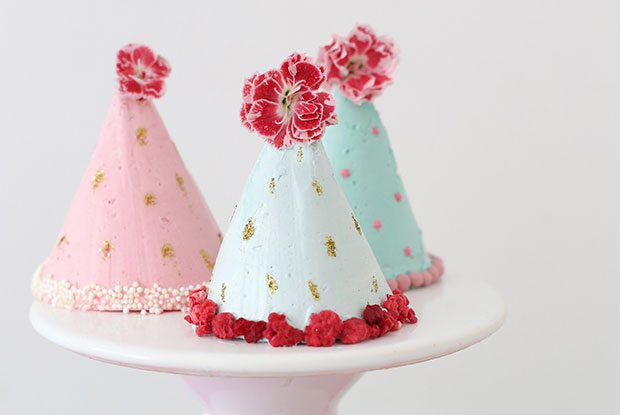
ASSEMBLING THE HATS
I recommend placing your party hats onto mini cake boards as it makes decorating and moving them around much easier.
1. Tint you buttercream with gel food colouring, in colours of your choice.
2. Place party hats onto cake boards.
3. Take the buttercream with a small spatula and smear a thick layer across all surfaces of the party hat. Using a metal bench scraper, smooth out the excess buttercream. It is best to work on a diagonal, with small steady strokes to achieve a smooth finish. Place them in the fridge once you’re happy with the finish. Repeat process on each hat.
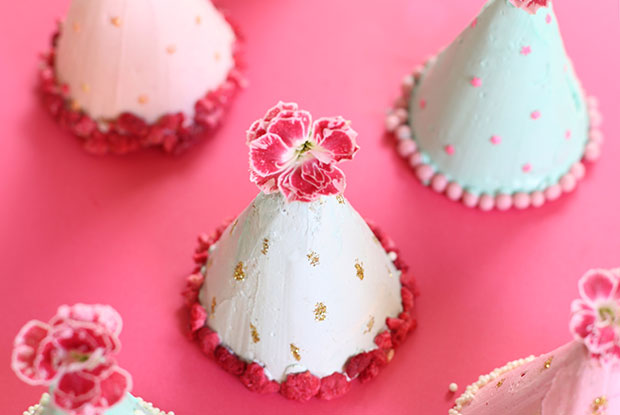
4. I've decorated my party hats with freeze-dried raspberry pieces, strawberry-chocolate pearls, and sprinkles along the base. Edible flowers are used for the top pom-pom, plus a few little star sprinkles around the sides. Feel free to use your imagination in this step, though. It's your chance to be creative.
And that's it! Keep in mind that these are best eaten on the same day. If you're prepping for a birthday bash though, feel free to keep them in the fridge overnight – just let them return to room temperature again before digging in.