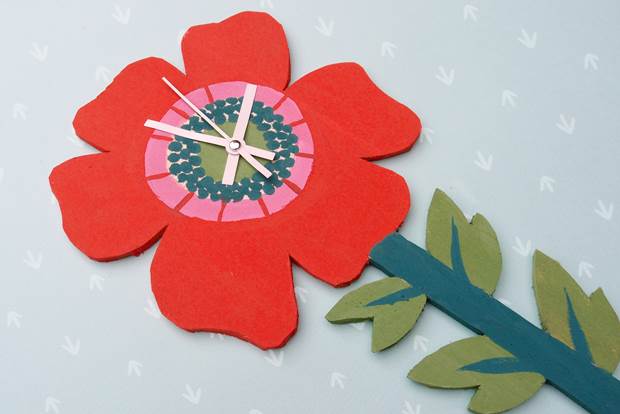
frankie exclusive diy: flower stem clock
Do your friends ask you to arrive at every hang-out an hour early, just so you’ll show up on time? Instead of being a perpetually tardy pal, why not give this DIY a go.
Do your friends ask you to arrive at every hang-out an hour early, just so you’ll show up on time? Instead of being a perpetually tardy pal, why not give this DIY a go. Perch this hand-painted pretty on your mantelpiece or hang on your wall for a subtle reminder not to dawdle when you really should be heading out the door.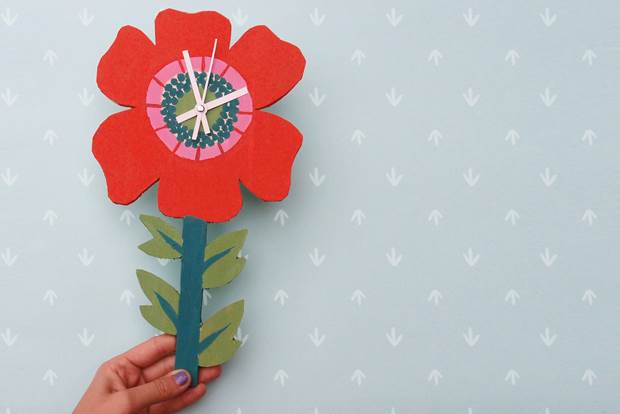
MATERIALS:
balsa wood – 10cm x 90cm x .5cm thick
clock mechanism with trimmable hands – bought online for a few dollars
acrylic paints
craft glue
stanley knife and cutting mat
brushes and paint palette
pencil
ruler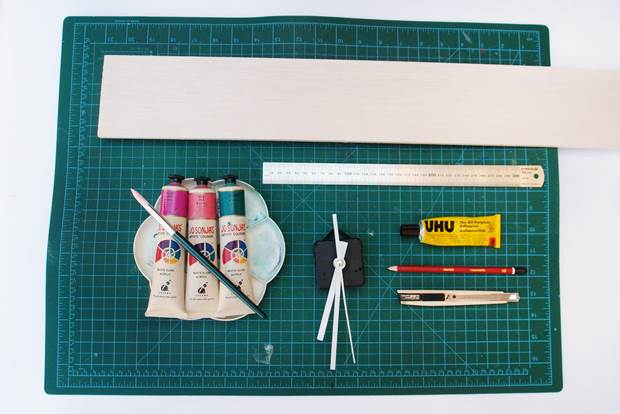
INSTRUCTIONS:
1. Begin by trimming your balsa wood down to size. Cut one length to 38cm long and another to 20cm long. Cut the 20cm length in half so that you have two pieces that are 20cm x 5cm.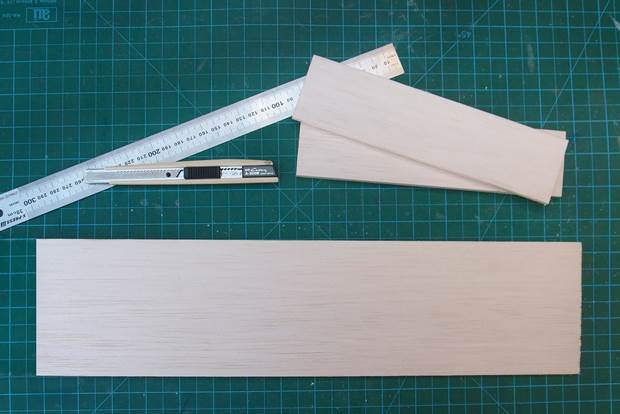
2. Glue the two 20cm lengths to either side of the larger 38cm piece, ensuring the wood is aligned to the top of this larger piece. This will give you a larger section of wood that measures 20 x 20cm to use for the flower, and a thinner part for the stem.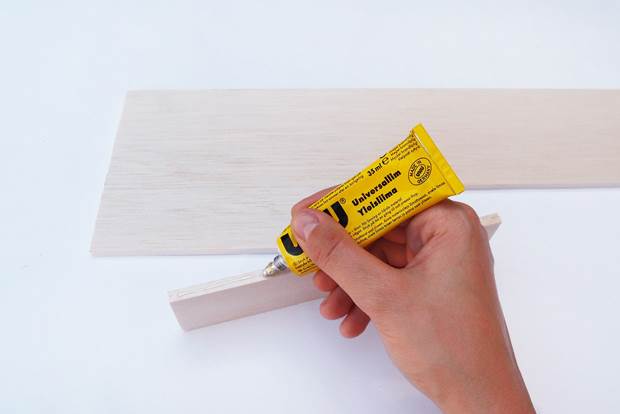
3. Once the glue is dry you can start marking out the clock face. Using the flower section of your piece of wood, find the dead centre of this 20 x 20cm piece and mark this with your pencil. Measure out 5cm to the left and right as well as up and down and mark these too. Connect these marks to form a diamond shape. Measure side of the diamond, divide this by three and mark the two intervals. Repeat this for the three remaining sides and then connect up all of you marks to form the hour positions on your clock face.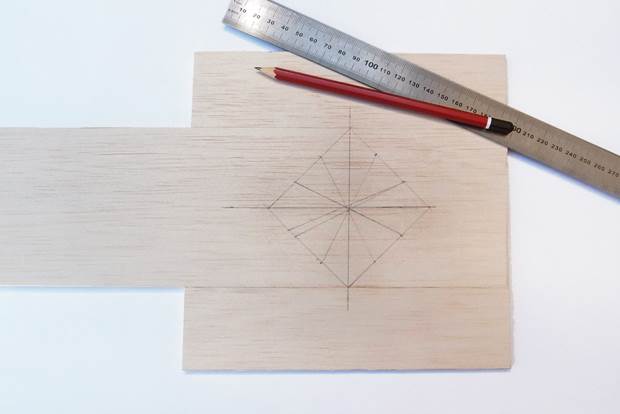
4. You can now draw the rest of your flower! Create a circle shape using the points of the diamond that you drew before. Draw another small circle in the middle of the diamond. Add six petals around the outer circle. Draw a stem around 3cm wide and some leaves coming off either side.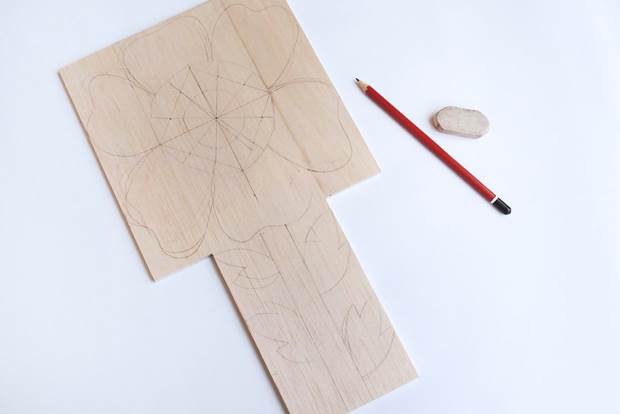
5. Cut around your outline using a stanley knife. The beauty of balsa wood is that it is so easy to cut, but it is also quite brittle so be careful around corners (it helps to make lots of small cuts rather that one big one). You will also need to pierce a hole through the centre of the clock face that will be big enough to fit the mechanism through. We just used a wooden skewer for this and gentle eased it around until the hole was big enough.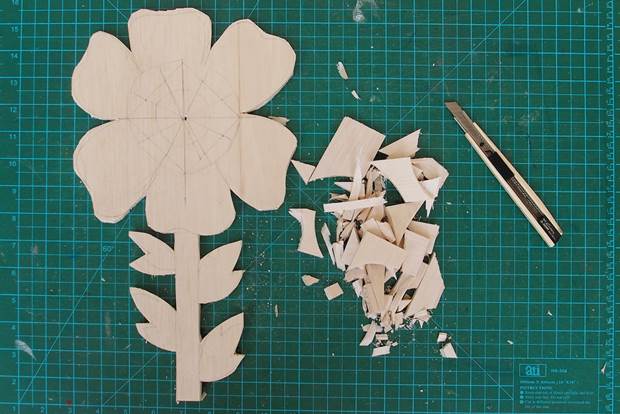
6. Mix up four paint colours of your choosing – two flower-coloured ones and two leaf-coloured ones.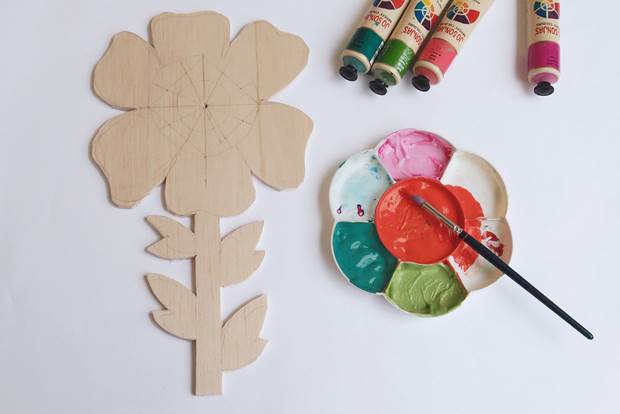
7. Now come the fun part – the painting! Paint the centre of the flower, petals and stem first, then come back to the clock face.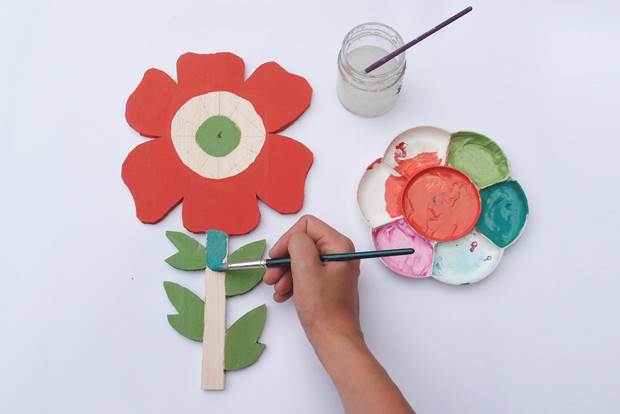
8. Paint the outer ring of your clock face with a contrasting colour to the petals. Once this is dry, carefully paint the hour markings with the same colour as your petals. You should be able to see the pencil lines you drew earlier through the paint. Once these marks are dry, fill in the remaining part of the clock face – we decided to add some fun spots to this part!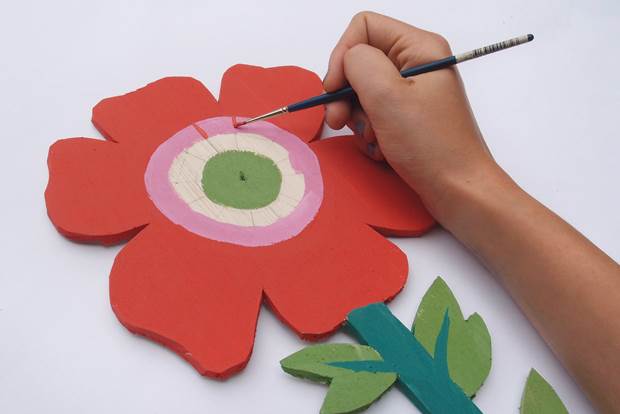
9. Lastly, you can attach the clock mechanism and hands to your wooden clock! Trim the hands down to size so they fit the shape of your flower clock face nicely. If you want to hang your new clock on the wall you can glue a hook on the back.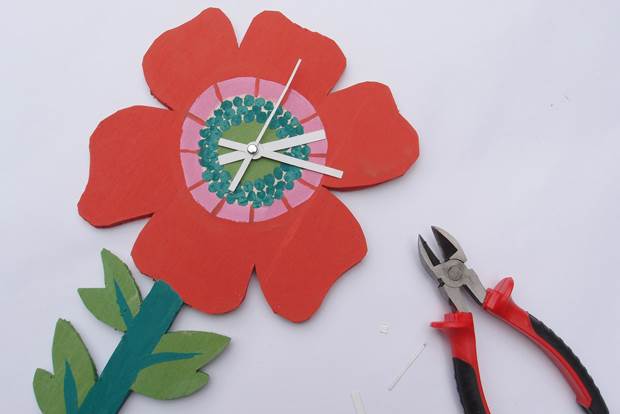
Words by Esther Sandler, the clever lady behind Togetherness Design.